 fatheryarik
Your mechanical keyboard isn’t just another peripheral sitting on your desk—it’s the heart of your gaming setup, your trusty companion through countless matches and epic gaming sessions. But here’s the reality: even the most premium mechanical keyboard accumulates dust, snack crumbs, and that sticky residue that gradually ruins your gaming experience and diminishes key responsiveness. The good news? Cleaning your mechanical keyboard is surprisingly straightforward, and you don’t need professional skills or expensive equipment to get the job done right.
Why Keeping Your Mechanical Keyboard Clean Matters
Dust particles and grime lurking between your keycaps are the ultimate enemies of mechanical switches. They clog up the mechanisms, create sticky keys, and reduce actuation accuracy—something that can cost you crucial victories in competitive gaming. Beyond performance, a dirty keyboard simply looks neglected and drags down the entire aesthetic of your gaming station. Regular mechanical keyboard maintenance extends its lifespan significantly and ensures every keystroke remains crisp and responsive exactly when you need it most.
Essential Tools for Mechanical Keyboard Cleaning
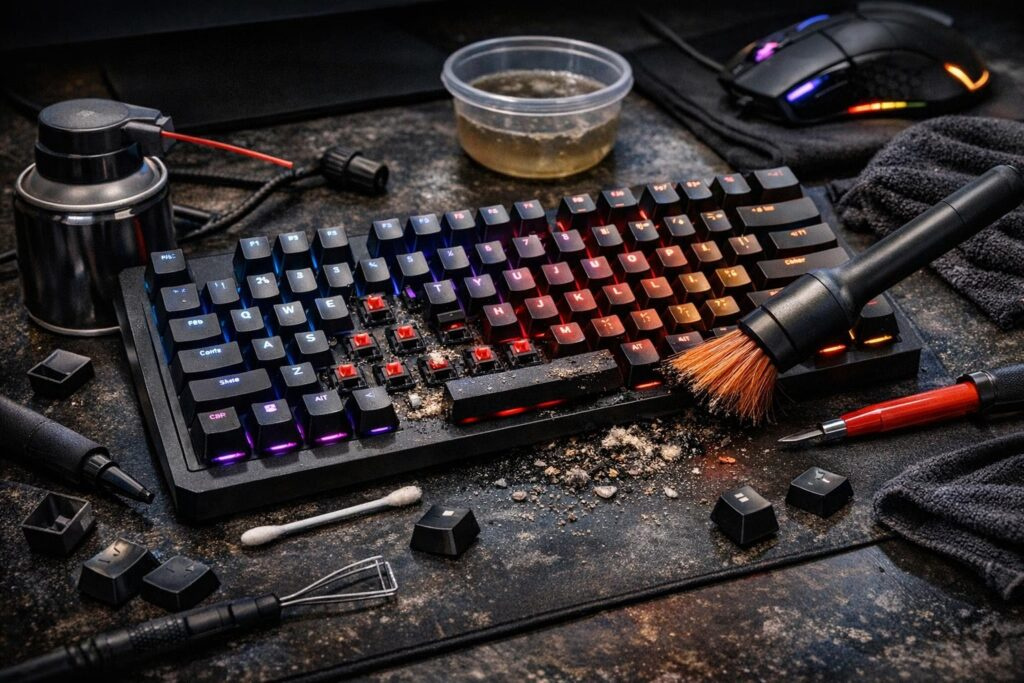
For a quick cleaning session on your mechanical keyboard, gather these basic supplies:
- Microfiber cloth — essential for scratch-free wiping and dust removal
- Compressed air canister — perfect for blasting dust from tight spaces between switches
- Soft-bristled brush or a clean toothbrush with gentle bristles
- Anti-static vacuum (optional, if you prefer this method)
- Slightly damp cloth (emphasis on slightly, not soaking wet)
Planning a thorough deep clean for your mechanical keyboard? Add these items to your arsenal:
- Keycap puller — specifically designed tool for safely removing keycaps without damage
- Isopropyl alcohol (70% concentration or higher) — your best friend against stubborn grime
- Small basin or container for soaking keycaps
- Switch puller (if you’re ready to tackle individual switches)
Quick Clean Method: When Time Is Limited
A fast mechanical keyboard cleaning routine takes roughly ten to fifteen minutes and works perfectly when you’ve got a ranked match starting soon. Here’s your step-by-step process:
- Disconnect your keyboard from your computer — this step is absolutely non-negotiable for safety
- Deploy compressed air strategically — blow between the keys at an angle to prevent pushing debris deeper into switches
- Wipe down the surface with microfiber — removes fingerprint smudges and surface dust effectively
- Brush between keycaps carefully — extracts trapped crumbs, hair strands, and other particles
That’s it! Your keyboard is refreshed and ready for action again.
Deep Cleaning Process: Complete Mechanical Keyboard Restoration
Deep cleaning your mechanical keyboard is a more involved procedure that should happen every three to six months, especially if you frequently eat at your battlestation or notice keys becoming sticky and unresponsive.
Step One: Preparation and Keycap Removal
Unplug your keyboard completely and take a detailed photograph of your layout—this reference photo will save you frustration during reassembly. Using your keycap puller, gently remove each keycap with steady upward pressure. Never yank forcefully, as mechanical switches are more delicate than they appear and can break under excessive force.
Step Two: Soaking and Washing Keycaps
Fill your container with warm water and add a small amount of mild dish soap. Submerge the keycaps completely and let them soak for fifteen to thirty minutes—this duration allows the soapy solution to break down oils and accumulated grime effectively. After soaking, rinse each keycap thoroughly under clean running water and dry them with your microfiber cloth.
Critical reminder: ensure keycaps dry completely before reassembly—minimum several hours, ideally overnight. Moisture infiltrating your switches means potential permanent damage to your keyboard.
Step Three: Cleaning the Keyboard Base and Switches
While your keycaps air dry, focus attention on the keyboard base:
- Blast compressed air through all gaps and corners systematically
- Use your soft brush to gently clean around switches without applying excessive pressure
- Take cotton swabs dipped in isopropyl alcohol to clean difficult-to-reach areas between switches
Isopropyl alcohol evaporates rapidly, making it safe for electronics. Just avoid leaving cotton fibers stuck in switches—change swabs frequently to prevent this issue.
Step Four: Final Assembly
Verify that all keycaps are bone dry and the keyboard base has aired out properly. Carefully reattach keycaps to their correct positions using your reference photograph as guidance. Your mechanical keyboard is now restored and battle-ready.
Critical Mistakes to Avoid During Keyboard Cleaning
Even experienced gamers sometimes make these cleaning errors that can damage their mechanical keyboards:
- Never spray cleaning solution directly onto your keyboard — liquid seeps into electronics causing irreversible damage. Spray your cloth first, then wipe
- Avoid excessive moisture — overly wet cloths compromise internal components
- Don’t use sharp objects for keycap removal — only proper keycap pullers prevent switch damage
- Skip regular high-powered vacuums — they generate static electricity that fries electronic components. Only use anti-static models
- Stay away from harsh chemicals — bleach and aggressive cleaning sprays discolor keycaps and deteriorate plastic materials
Recommended Cleaning Frequency for Mechanical Keyboards
Maintaining keyboard cleanliness isn’t a one-time sprint—it’s an ongoing commitment. Establish these habits:
- Weekly routine — quick wipe-down with microfiber and compressed air blast. Takes five minutes but prevents dust accumulation
- Every three to six months — complete deep cleaning with full keycap soaking and switch cleaning
If you’re a gamer who eats at your desk or shares your keyboard with roommates, increase cleaning frequency—every two months becomes more appropriate.
Fixing Sticky Keys on Mechanical Keyboards
When a key sticks and returns sluggishly, liquid or sticky residue has infiltrated the switch. Here’s your solution:
- Remove the problematic keycap carefully
- Soak it in warm soapy water for fifteen to twenty minutes
- Gently clean the switch stem underneath with an alcohol-dampened cotton swab
- Allow everything to dry completely before reassembly
If stickiness persists, liquid may have penetrated deep into the switch mechanism—you’ll need to extract the entire switch for thorough cleaning or replacement.
Additional Maintenance Tips for Longevity
Preventive Measures
Prevention beats cure every time. Consider these protective strategies:
- Keep drinks away from your keyboard or use spill-resistant containers
- Wash hands before gaming sessions to reduce oil transfer
- Use a keyboard cover when not actively gaming
- Position your keyboard away from dusty areas
Storage Considerations
When transporting your mechanical keyboard to LAN parties or tournaments, proper storage prevents damage and contamination. Use a dedicated keyboard case or wrap it carefully in microfiber cloth before placing it in your gear bag.
Understanding Different Keycap Materials
Keycap material affects cleaning approach slightly. ABS plastic keycaps are more susceptible to shine and yellowing over time, while PBT keycaps resist wear better but still require regular cleaning. Both types handle warm soapy water well, but always ensure thorough drying regardless of material composition.
When Professional Cleaning Becomes Necessary
Sometimes DIY cleaning isn’t enough. Consider professional keyboard servicing if you experience persistent issues after thorough cleaning, notice corrosion on the PCB, or accidentally spilled significant liquid inside your keyboard. Professional technicians have specialized equipment and expertise for complex repairs.
Final Thoughts on Mechanical Keyboard Maintenance
Maintaining a clean mechanical keyboard doesn’t require enormous effort when you establish proper routines. Just fifteen minutes weekly for quick maintenance and one thorough deep clean every few months keeps your trusted gaming companion performing like new. Remember: your mechanical keyboard represents an investment in gaming enjoyment and competitive performance—it deserves minimal care to deliver maximum results. Clean keyboards mean precise clicks, responsive actuation, and extended peripheral lifespan. Start your cleaning routine today and experience the difference immediately.
Frequently Asked Questions
Can I wash my entire mechanical keyboard under running water?
Absolutely not. Never submerge your mechanical keyboard or run it under water. Only remove and wash the keycaps separately. Water damages the PCB, switches, and electronic components permanently. Stick to removing keycaps and cleaning the base with damp cloths and isopropyl alcohol.
How long should keycaps dry before putting them back?
Keycaps need minimum three to four hours drying time, but overnight is ideal. Rushing reassembly with damp keycaps risks moisture seeping into switches and causing malfunction or corrosion. Pat them dry with microfiber cloth after washing, then leave them spread out on a towel in a well-ventilated area.
What percentage isopropyl alcohol is best for keyboard cleaning?
Use 70% concentration or higher for optimal results. Higher concentrations (90-99%) work even better because they evaporate faster and leave less residue. Lower concentrations contain more water, which increases risk of moisture damage to electronic components.
Is it safe to remove all keycaps at once?
Yes, removing all keycaps simultaneously is perfectly safe if you use proper technique with a keycap puller. Just photograph your layout first for reference during reassembly. Pull straight upward with steady pressure—never twist or yank sideways, which can damage switch stems.
Can I use a hairdryer to speed up keycap drying?
Avoid using hairdryers on high heat settings as excessive heat can warp plastic keycaps, especially ABS variants. If you must accelerate drying, use cool air setting from a distance. Natural air drying remains the safest method that won’t risk deforming your keycaps.
How do I clean RGB lighting on my mechanical keyboard?
Clean RGB components gently with slightly damp microfiber cloth. Never spray liquid directly on lighting elements. For accumulated dust around LEDs, use compressed air carefully. The LEDs themselves are sealed, but moisture on the PCB can cause electrical issues affecting lighting functionality.
Comments (0)
Sign In / Sign Up
Sign in with your Google account to leave a comment. It's fast, easy, and secure.
No comments yet
Be the first one to share your thoughts!